
Introduction
One common requirement is to send automated email notifications based on data stored in SharePoint lists. However, dealing with complex data types such as multi-choice lookup columns in SharePoint can be challenging, as these fields are stored as arrays and can make the email content look cluttered.
In this blog, I’ll walk you through building a Power Automate flow that sends a well-formatted email based on SharePoint list data, specifically handling multi-choice lookup columns.
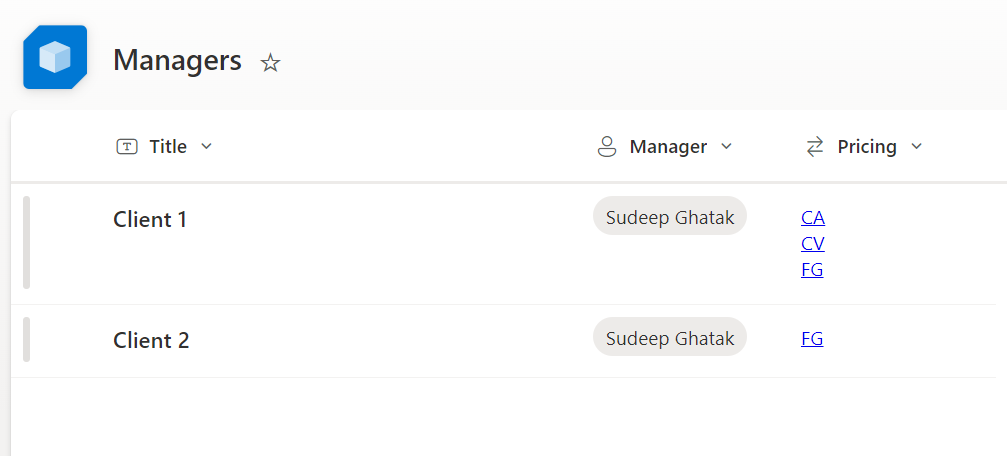
Sample
For this blog, I will be using a list with a People field “Manager” and a multi-option Lookup field “Pricing”
Problem
When dealing with multi-choice lookup columns in SharePoint, the values are stored as arrays, leading to lookup content in emails that look like this:
[
  {
    "@odata.type": "#Microsoft.Azure.Connectors.SharePoint.SPListExpandedReference",
    "Id": 21,
    "Value": "CA"
  },
  {
    "@odata.type": "#Microsoft.Azure.Connectors.SharePoint.SPListExpandedReference",
    "Id": 22,
    "Value": "CV"
  },
  {
    "@odata.type": "#Microsoft.Azure.Connectors.SharePoint.SPListExpandedReference",
    "Id": 13,
    "Value": "FG"
  }
]
Solution
To address this, we will create a Power Automate flow that:
- Stores the lookup field as an array.
- Converts the lookup field into a concatenated string.
- Sanitizes the list item into a readable format.
- Builds an HTML table with the list data.
Instructions
I start by sharing the entire flow
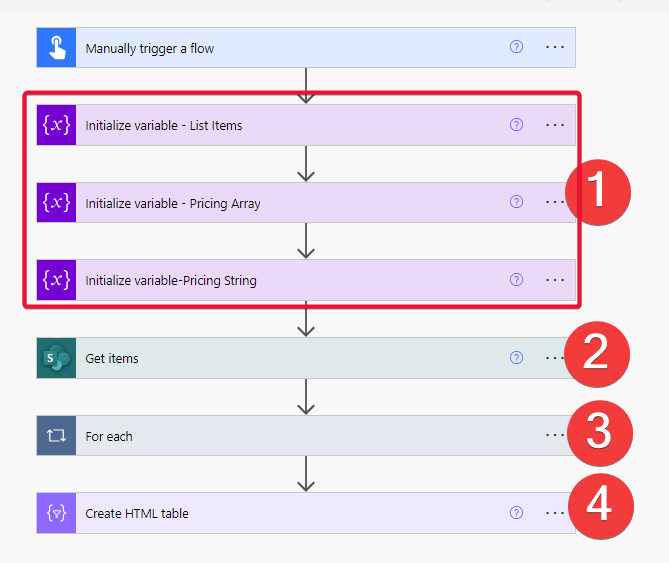
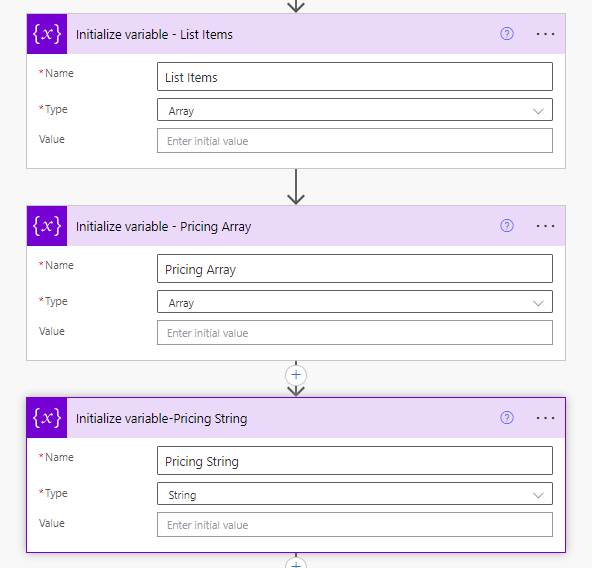
Step 1: Initialize Variables
First, we need to initialize three variables in our flow:
- Pricing Array: To store the lookup field as an array.
- Pricing String: To store the concatenated string of lookup values.
- List items: To convert and sanitize the list item into a readable list.
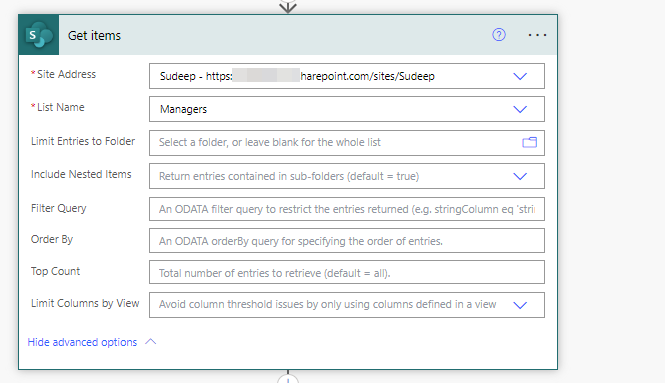
Step 2: Get Items from the SharePoint List
Query the list. Add any oData filters if required.
Step 3: Apply to Each Item
Use an “Apply to each” action to process each item from the SharePoint list.
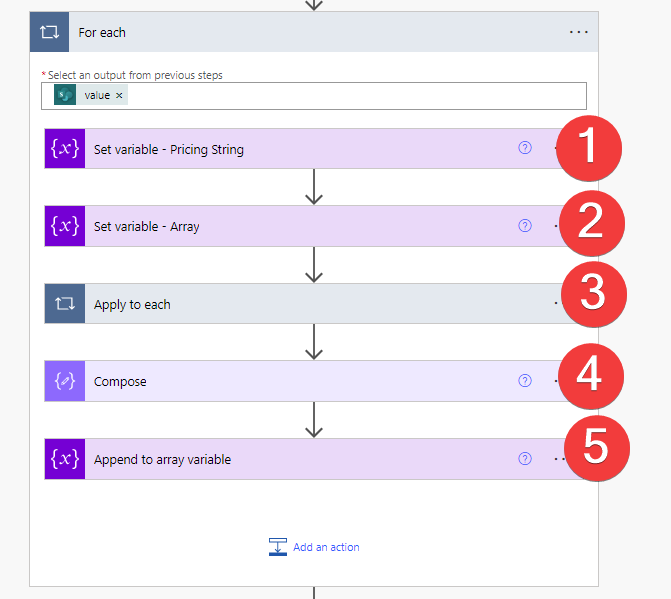
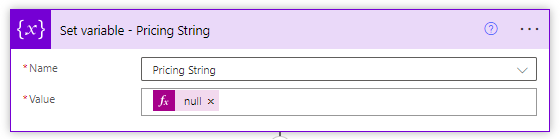
Step 3.1: Set Pricing String Variable to null
Reset the Pricing string variable before moving to the next list item. Do this by setting value to the expression “null” or just enter a space.
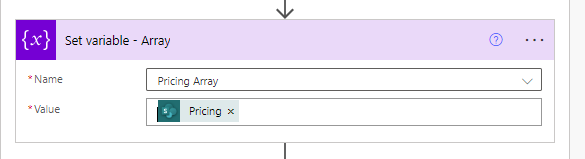
Step 3.2: Set Pricing Array Variable
Set the Pricing Array variable with the value of your multi-choice lookup column.
Step 3.3: Apply to Each Lookup Value
Use another “Apply to each” action to iterate over each value in the Pricing Array.
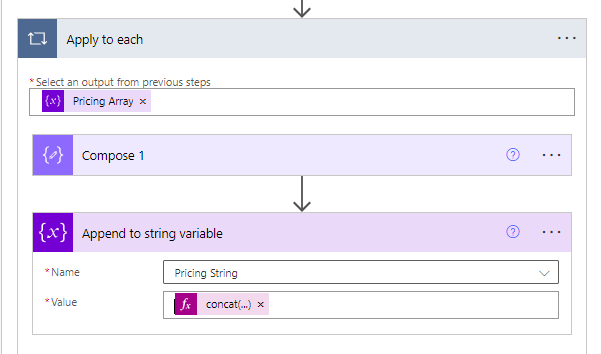
Inside this loop:
- Append each lookup value to the Pricing String variable.
- Add a delimiter such as a comma or line break for readability.
concat(items('Apply_to_each')['Value'],',')
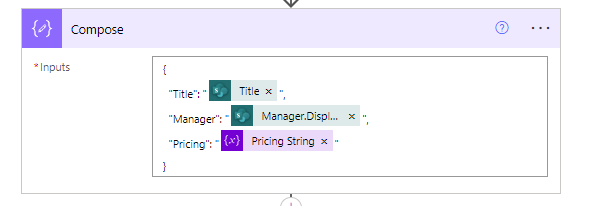
Step 4: Craft the desired List Item look
- For People fields, just pick the DisplayName or Email as needed.
- For Lookup fields, reference the Pricing String variable
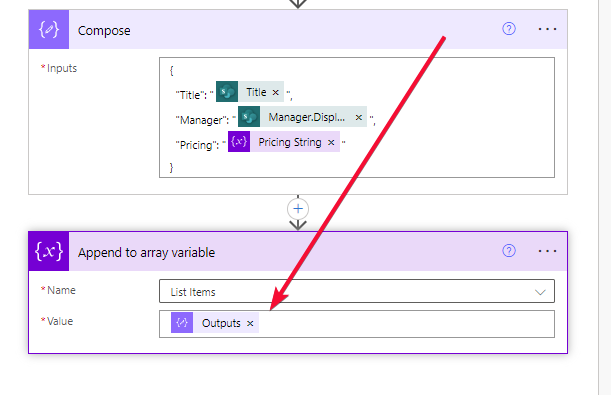
Step 5: Set List Items Variable
Step 5: Create HTML Table
Use the “Create HTML table” action to build an HTML table from the List items Array variable.
@{variables('List items')}Step 6: Send an Email
Finally, use the “Send an email” action to send the email. In the body of the email, include the HTML table created in the previous step.
Final Output
