
Introduction
Power Apps is a powerful platform that allows you to create custom business applications without extensive coding. In this blog post, we’ll explore how to download data from a Power Apps Gallery as a CSV file. We’ll follow a simple demonstration using a collection with a sample JSON structure, a Gallery, checkboxes, and a Power Automate flow.
Step 1: Create a Collection with Sample Data
Start by creating a collection in Power Apps. For demonstration purposes, let’s call it CarCollection
ClearCollect(CarCollection, [
    { make: "Toyota", model: "Camry", year: 2020, color: "Blue" },
    { make: "Honda", model: "Civic", year: 2019, color: "Silver" },
    { make: "Ford", model: "Mustang", year: 2022, color: "Red" },
    { make: "Chevrolet", model: "Equinox", year: 2021, color: "Black" },
    { make: "Nissan", model: "Altima", year: 2018, color: "White" },
    { make: "Tesla", model: "Model 3", year: 2023, color: "Green" },
    { make: "BMW", model: "X5", year: 2022, color: "Gray" },
    { make: "Mercedes-Benz", model: "E-Class", year: 2020, color: "Silver" },
    { make: "Audi", model: "A4", year: 2021, color: "Blue" },
    { make: "Lexus", model: "RX", year: 2019, color: "Black" }
])
Step 2: Display Car Data in a Gallery
Add a Gallery to your Power App and set its Items property to CarCollection. This will visually represent the car data.
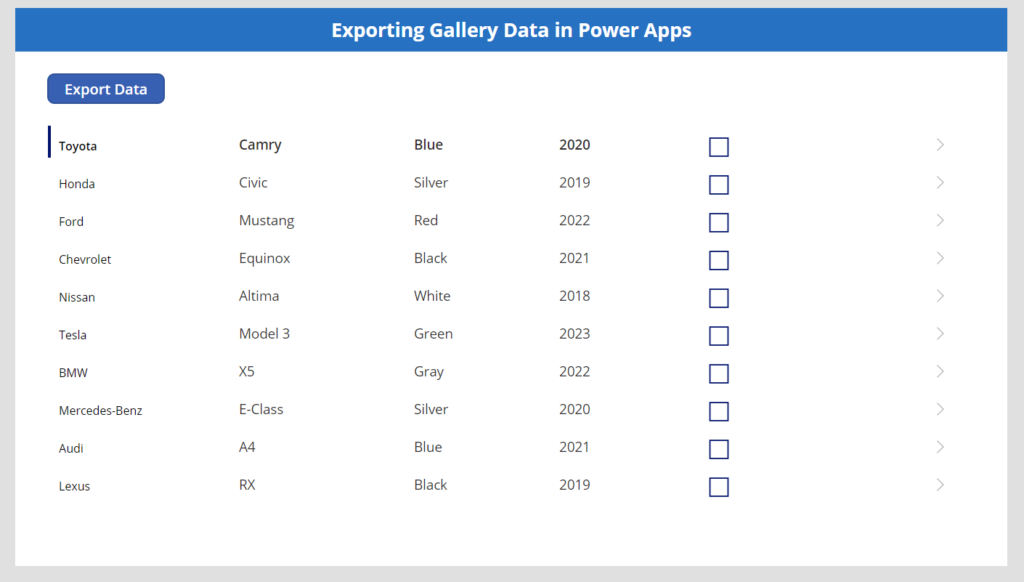
Step 3: Add Checkboxes for Selection
Within the Gallery, add a checkbox control. Set the OnCheck property to Collect(colDataToExport, ThisItem) and the OnUncheck property to Remove(colDataToExport, ThisItem). This allows users to select cars they want to export.

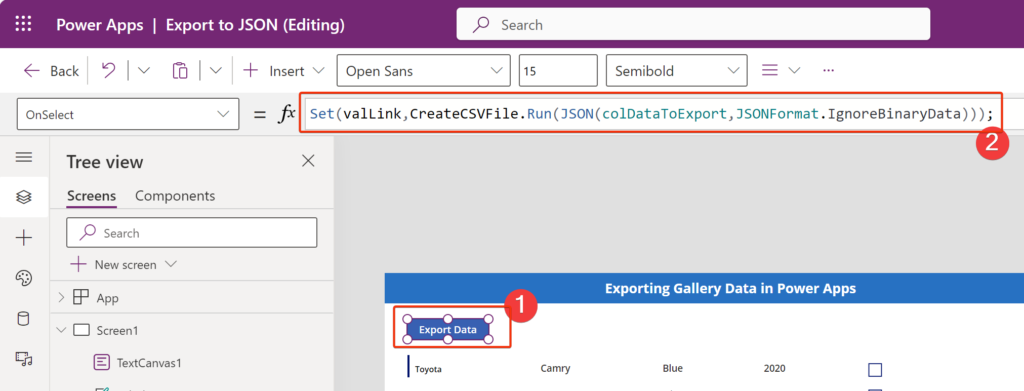
Step 4: Create a Button to Trigger the Export
Add a button to your Power App. Set its OnSelect property to trigger a Power Automate flow.
Step 5: Design the Power Automate Flow
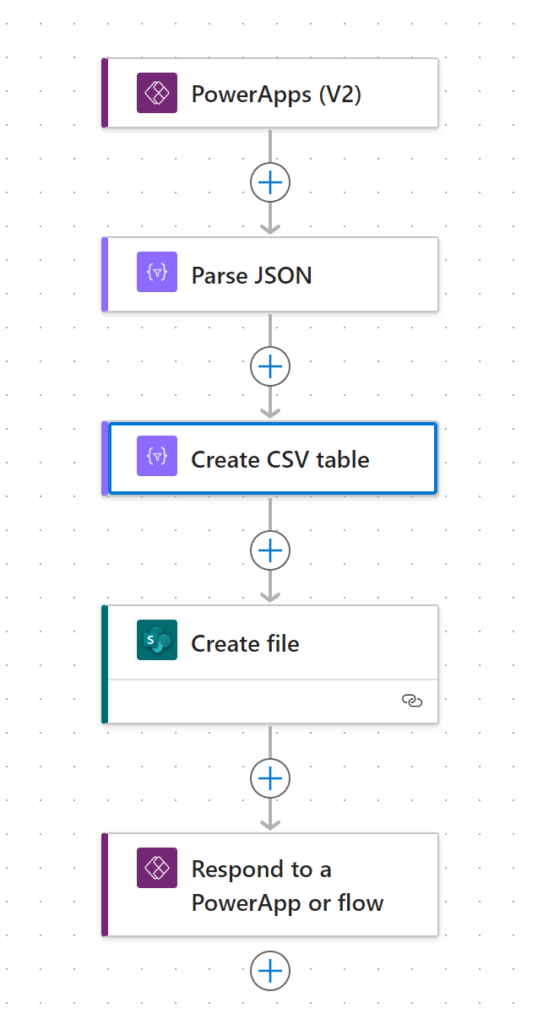
Action 1: PowerApps Trigger
- Create a PowerApps trigger as the first action. Set its input to
JSONInput.

Action 2: Parse JSON
- Add a Parse JSON action to interpret the JSON input from PowerApps. Configure it to use the JSON content you’re passing from PowerApps, based on the car data structure.
Parse JSON Schema
{
    "type": "array",
    "items": {
        "type": "object",
        "properties": {
            "make": {
                "type": "string"
            },
            "model": {
                "type": "string"
            },
            "year": {
                "type": "integer"
            },
            "color": {
                "type": "string"
            }
        },
        "required": [
            "make",
            "model",
            "year",
            "color"
        ]
    }
}
Action 3: Create CSV Table
- Include a Create CSV Table action to convert the parsed JSON into CSV format.
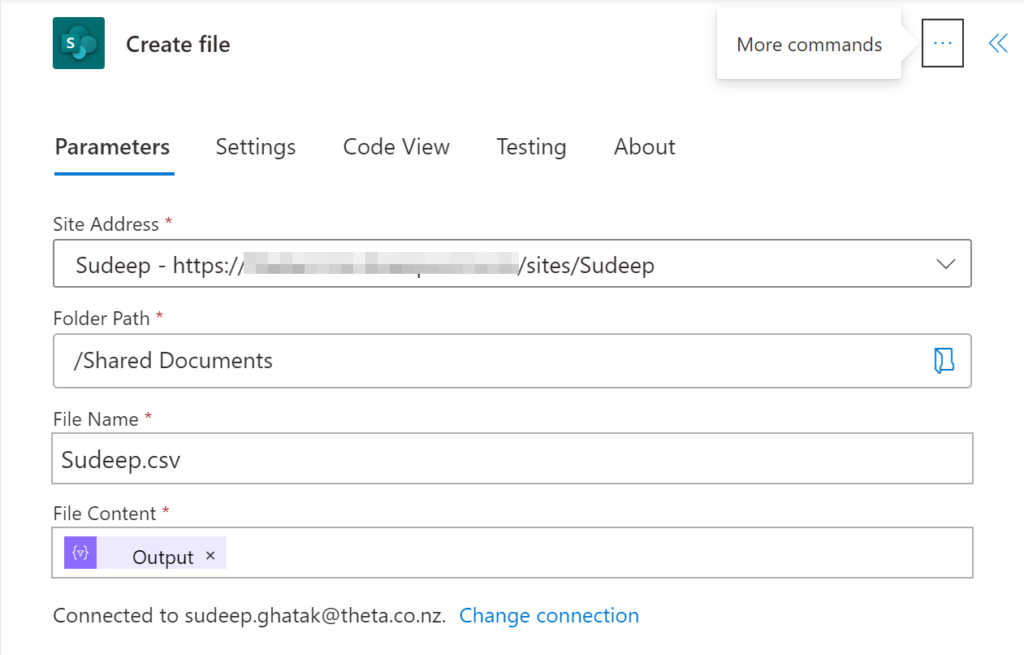
Action 4: Create File in SharePoint
- Add an action to create a file in SharePoint using the CSV output. Specify the desired folder path and file name.
Action 5: Respond to PowerApps
- Lastly, use the Respond to PowerApps action to send back the location of the CSV file.
Complete Flow
Conclusion:
With these tailored steps, you’ve successfully set up a Power Apps Gallery, allowed users to select cars for export, and created a Power Automate flow to convert the selected car data to CSV and store it in SharePoint. This integration enhances the capabilities of Power Apps, making it easy to export car data for further analysis or sharing. Feel free to customize and adapt this guide based on your specific needs. Happy Power Apping!