
To build a Power Automate flow that downloads a SharePoint list into a CSV file, follow these steps:
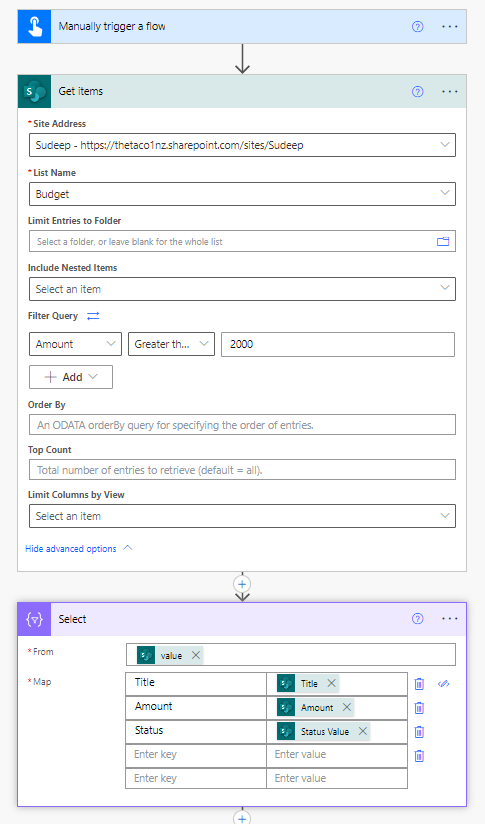
- Set the trigger to “Manually trigger a flow” or choose an appropriate trigger based on your requirements.
- Add an action and search for the “Get items” action for SharePoint.
- Configure the “Get items” action to retrieve the desired list items from SharePoint. Note: By default, Power Automate’s “Get Items” action in SharePoint returns a maximum of 5000 items. However, you can increase this limit by using the “Filter Query” option.
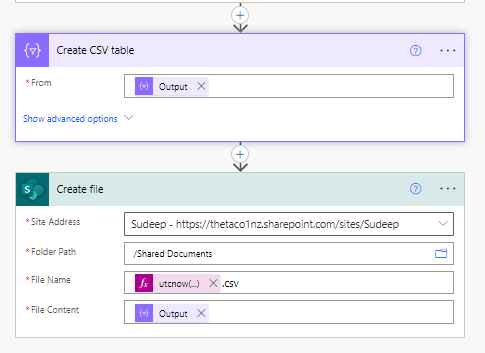
- Add another action and search for the “Create CSV table” action.
- Map the dynamic content from the “Get items” action to the “Create CSV table” action to populate the CSV table.
- Add a “Create file” action and choose the desired storage location (e.g., OneDrive, SharePoint, or another cloud storage service).
- Set the “File name” field to include the “.csv” extension.
- Map the “Content” field to the output of the “Create CSV table” action.
When executed, this flow will retrieve the SharePoint list items, convert them into a CSV table, and create a CSV file in the specified storage location. You can then download the CSV file for further use or distribution.